Recapture Lost Sales with Facebook Retargeting
By Dennis Moons
I was browsing around on Facebook for the latest batch of funny videos when I saw those shoes again.
My current running shoes were worn out, so I’d been comparing a couple of different models. I hadn’t decided on anything yet. But buying a new pair of shoes was still on my mind.
And the running shoe ads weren’t letting me forget it. They were reminding me of the store and all the different models they had in stock..
A day later, after another workout with my old worn-out shoes, I saw the ads again. I had some time so I decided to look what the store had to offer.
40 minutes later a brand new pair of running shoes was on its way to my house!
The Facebook retargeting ads clearly got to me.
In this article I’ll teach you exactly how to accomplish this for your own store using Facebook retargeting campaigns.
Retargeting 101
Retargeting allows you to
re-capture your website visitors, create trust and familiarity with your store and products and stay top of mind until those visitors are ready to buy.
You do that by showing advertisements to people that have visited your website before but haven’t bought. By placing a cookie on the computer of these visitors, you can reach them again later.
The two big platforms to run retargeting campaigns are Facebook and
Google remarketing.
They work pretty much the same; the biggest difference is in where your ads show up.
Google uses its network of third party websites and apps to show banner ads.
Retargeting on Facebook shows advertisements in different parts of their site and apps.
Both platforms have massive reach. Google has about 93% of all sites in its portfolio and the average Facebook user spends about 40 minutes a day on its site. So you’ll have plenty of opportunities to reach your visitors again.
The best way to learn how to run a great Facebook retargeting campaign is to set one up for yourself.
So in what follows, we’ll setup a new campaign together.
Step 1: Creating a retargeting audience on Facebook
First you’ll need a Facebook advertising account. Go to the dropdown menu in the top right of your Facebook account, and Choose Manage Ads to get started.
Before we can create a campaign we need to define the audience we want to show our ads to.
In the left-hand menu, pick
Audiences:
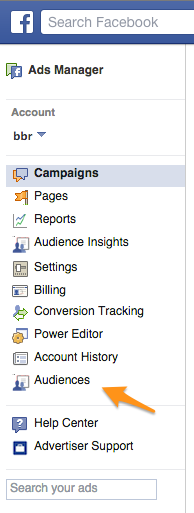
Then you see the overview of all the Audiences you’ve created. Let’s create a new Audience.

The dropdown menu shows 3 different options, choose Custom
Audience.
That will show another screen with more options, let’s start with the easiest one,
Website traffic.
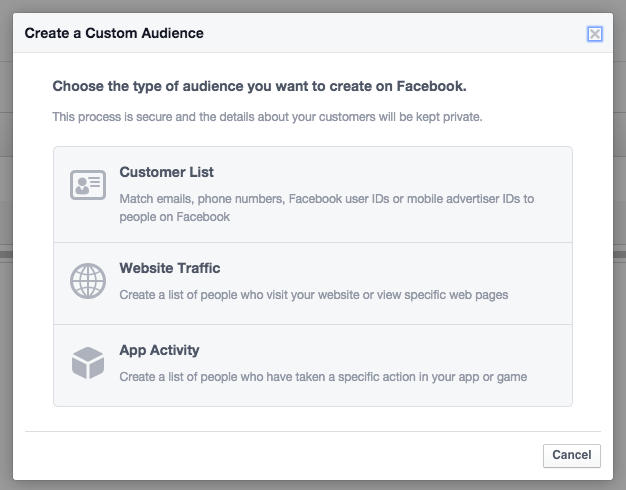
Facebook has the following options:
Anyone who visits your website
This is the broadest possible audience you can create. Choose the time window, 30 days by default and extendable till 180 days and that is it.
All visitors that have visited your site during this period will see the ads.
Getting the time window right isn’t easy, it depends how long it takes for a customer to buy. If most of your customers buy within the first week, it doesn’t make sense to still be showing ads to them 5 months later.
People who visit specific web pages
This option allows you to be more specific and only include visitors into your audience that have visited certain pages.
A couple of ideas: people that visited product pages, visitors that have started the checkout, etc.
People visiting specific web pages but not others
Another step up is the ability to exclude visitors that have visited certain pages.
That means you can exclude the people that have just bought from you, no point in annoying them with more ads, right?
People who haven't visited in a certain amount of time
This is a bit different from the options above.
Here you’ll show ads to people who have visited your store in the last 180 days, but haven’t visited again in a certain number of days.
Custom combination
You can also create a custom combination of the options above.
I would advise you to pick one of the options above and stick with it. As your site gets more visitors and your Facebook audience grows, you can run more advanced campaigns.
If for example, you want to reach people that have looked at, but haven’t bought a product on your site in the last 30 days, the settings would look as follows:

Call this audience Product page visitors.

Now that you’ve defined who Facebook should include in your audience, you need to place a piece of Javascript code on every page of your site, a tracking pixel.
That way Facebook knows which visitor visited which page. (You’ll see a red indicator when this hasn’t been set up yet.)
To do that, tick the checkbox of the audience and go to the Actions dropdown menu on top and choose View Pixel.

There you’ll see the code you’ll need to place in the section of every page of your own website.
Note that if you create audiences for multiple websites, the tracking pixel will always be the same.
So you must either be very specific in how you configure who is included in a certain audience or create different Facebook advertising accounts for each site to avoid confusion and mistakes.
Step 2: Measuring success with Conversion Tracking
You’re running campaigns to sell more, so it’s important that you (and Facebook) can track when a sale takes place.
To do that, click
Conversion Tracking, in the left-hand menu then click Create pixel.
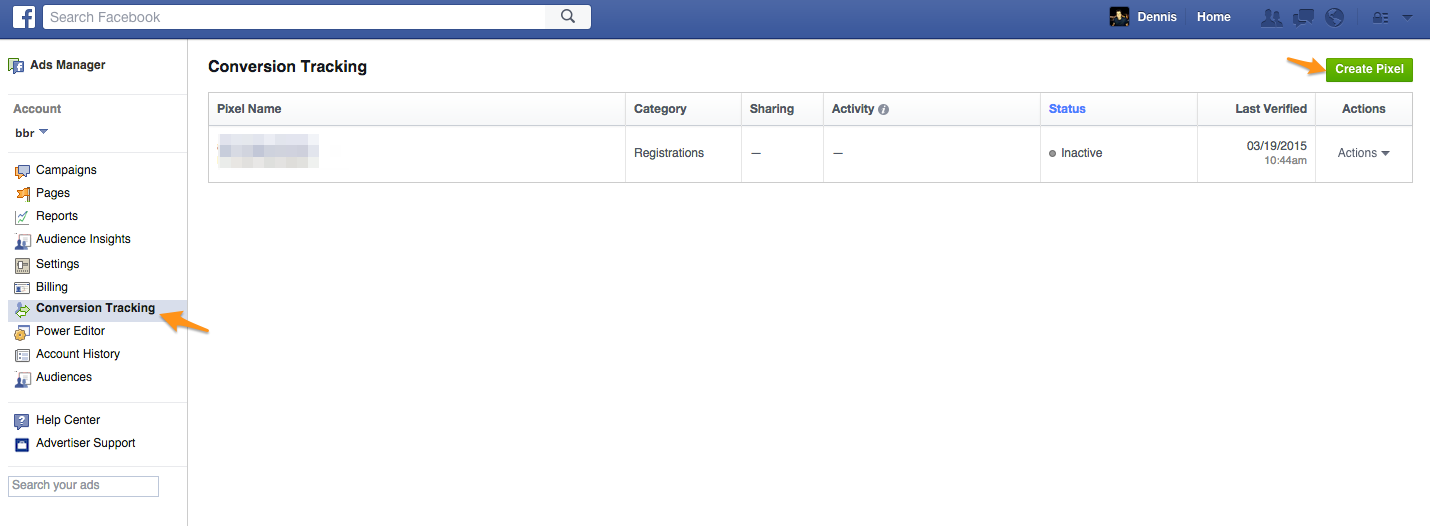
Choose to measure
Checkouts, and then give the pixel a name.
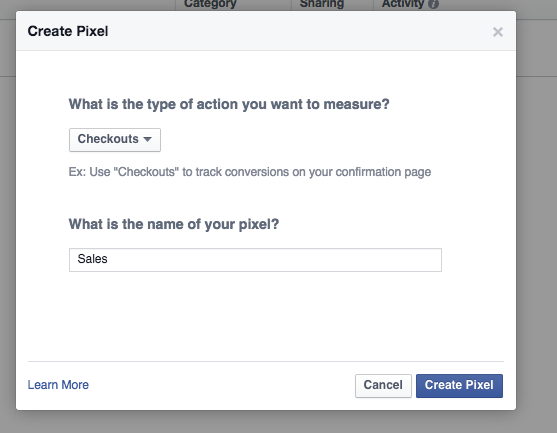
Now this pixel needs to be added in the section on the success page of your ecommerce cart.
Facebook will give you a warning as long as the pixel isn’t installed. But if it is on the right page and you visit that URL yourself, Facebook will automatically verify it.

Step 3: Creating a Facebook Retargeting Campaign
You’ve identified the visitors you want to retarget; you know when new sales come in, so now you’re (finally!) ready to create the actual advertisements.
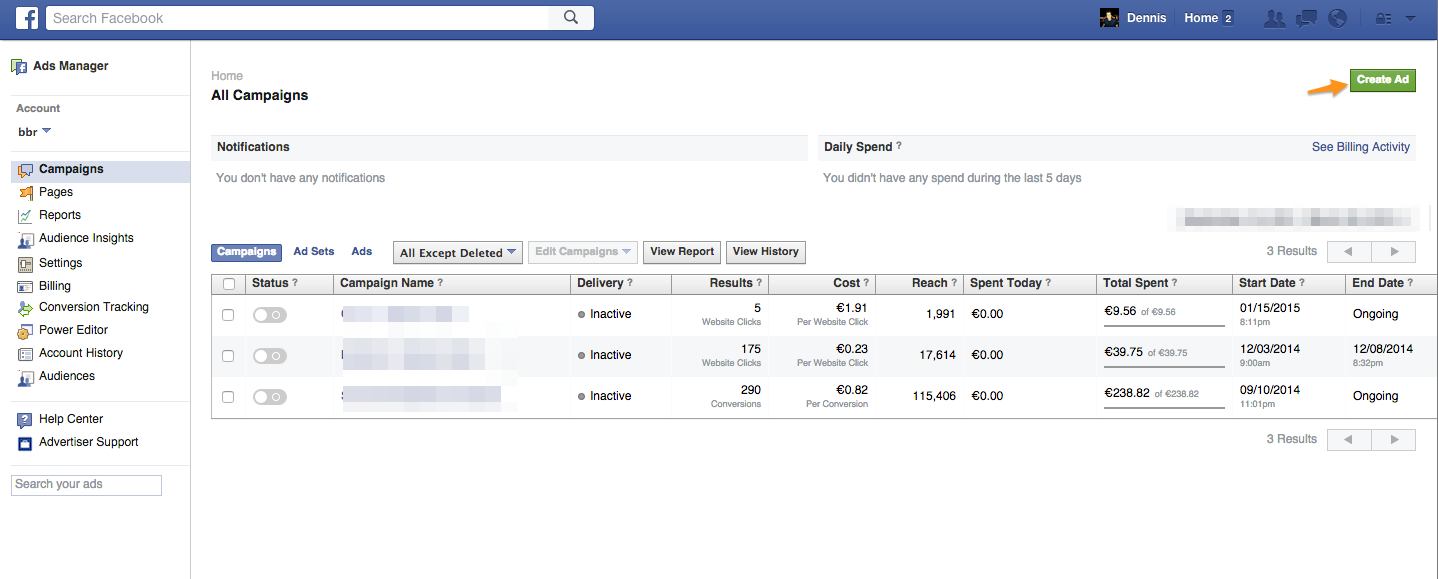
Go to the Ad manager and pick
Create Ad in the top right corner.
First you have to select the objective of your campaign, choose Increase conversions on your website.
If you want to track in your Google Analytics account which visitors came from this specific advertising campaign, you need to add a couple of parameters to the URL you are using.
Otherwise it will display all your traffic as a referral from facebook.com, which makes it hard to track which are paid and un-paid visitors.
You can use the following free tool by Google to
create these custom URLs
As
campaign source, fill in Facebook, for medium choose cpc and for the campaign name use retargeting.
Copy the URL with parameters and paste it into the URL field and choose the Conversion pixel you’ve created before from the dropdown menu.
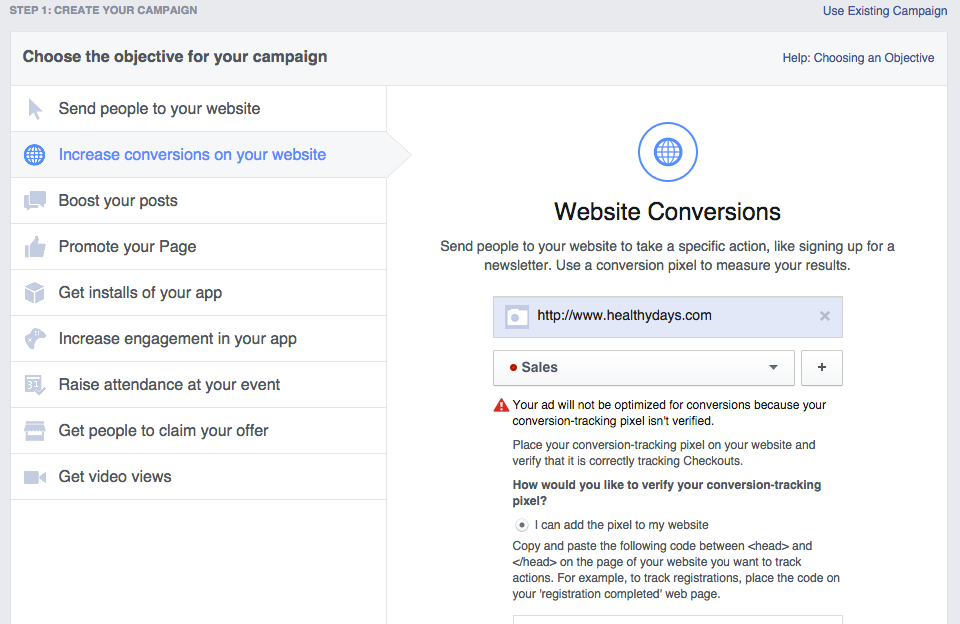
If it’s still unverified, select the I can add the pixel to my website option to continue.
Pick a descriptive name to make it easier to distinguish between retargeting and
other types of campaigns.
I’m naming my campaign Retargeting HealthyDays.com to promote my fictitious nutrition store.
You’ll be asked to select your audience. Select the audience you’ve just created from the menu.
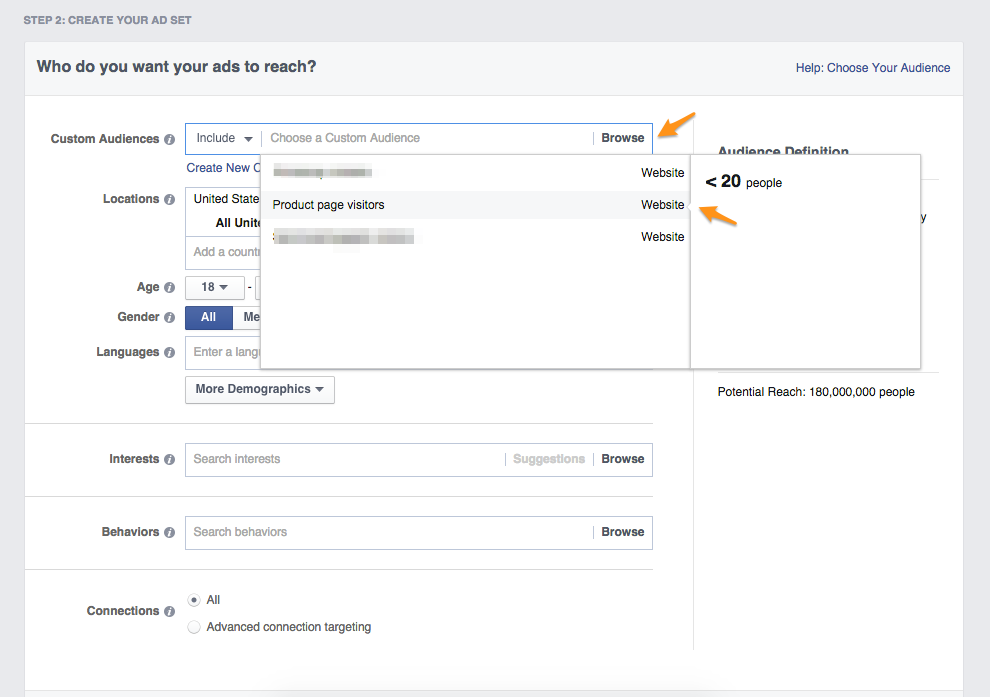
Then you can further narrow it down to a certain location, city or even ZIP code. Other options are languages, age, gender or interest categories.
This is great to enforce limitations that you might have, for example if you only ship to certain countries.
But be aware that each parameter, further limits the reach of your campaign.
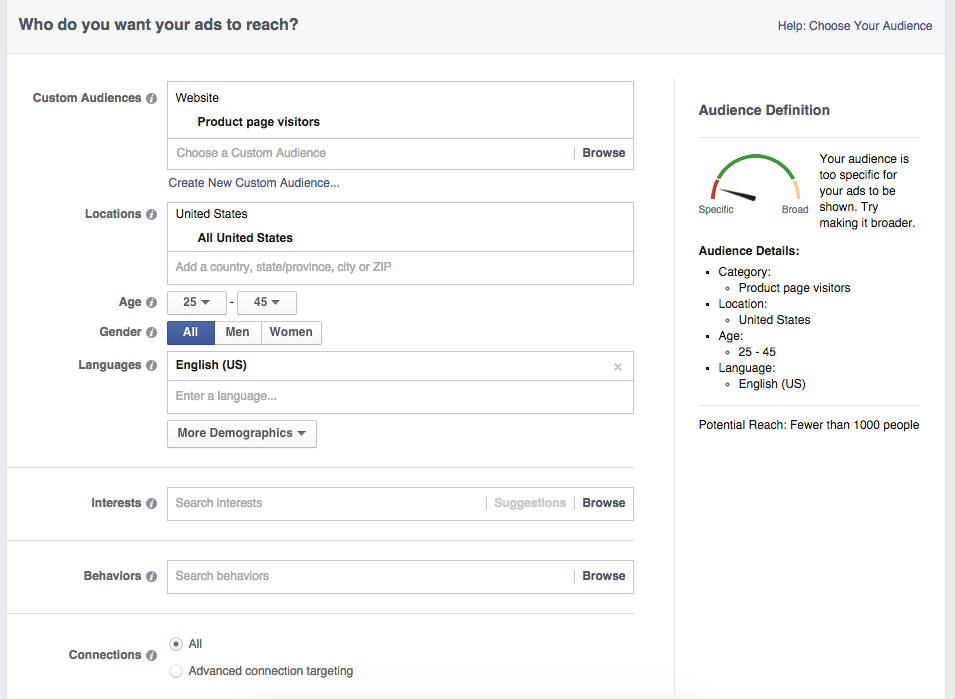
My example store HealthyDays.com only ships in the US, so I’m limiting my campaigns to that region. Plus I also know that my most profitable customers are between 25 & 45, so I’ve turned that on as well to invest my budget in the most effective way.
Setting a Budget
It’s always hard to predict what kind of budget you need to get good results. The amount you’ll be charged depends on your settings and the level of competition for the Facebook users you are trying to reach.
Start out with something you’re comfortable with, like $4-10/day.
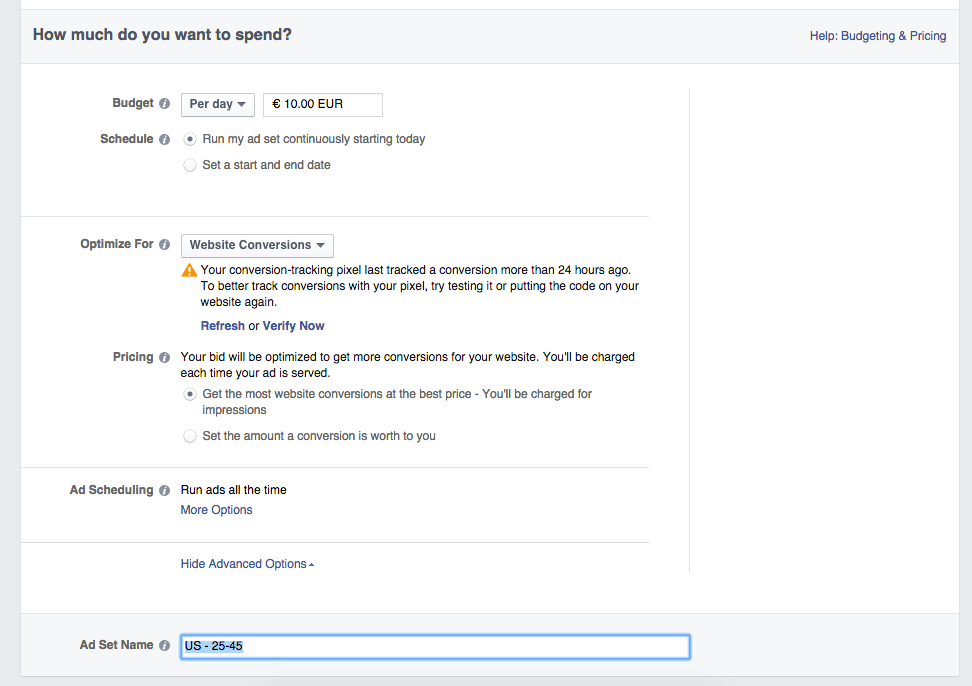
Click Show Advanced Options to reveal more bidding options.
Facebook will then ask you what they should optimize for, so choose Website conversions (this will only show if you’ve verified your conversion pixel).
This option means that Facebook will crunch a lot of data to find the users that are most likely to convert on your website.
In the Pricing section you can see how they will charge you. For now just use the default option: Charge for impressions.
Over time, when you get a better grasp on your numbers, you’ll know exactly how much you can spend on a Facebook conversion.
Ad set refers to the group of ads you’ll create. Leave it like it is for now.
Selecting Good Advertisements
Now it is time to unleash all your creativity and come up with a couple of advertisements.
Luckily Facebook makes it pretty easy to create good ads.
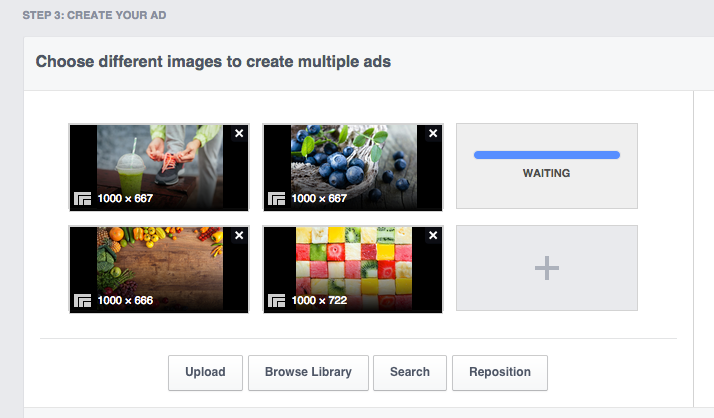
First look for a couple of pictures. Select photos or illustrations that attract attention and are relevant to your business and audience.
If you’re creating ads around individual products you’ll want to include a couple of
good product photos.
If you’re running a general advertisement about your store, like the one below, you can feature a couple of products.

Facebook recommends using images with a resolution of 1200 x 628 pixels, although smaller images also work.
If you only have really basic product photos, Facebook has a cool feature that lets you use pictures from Shutterstock for free in your ads.
Click Search & add a couple of photos.
Selecting ad formats
Facebook offers a number of different formats for advertisement campaigns. You can select all of them, or pick only one.
Each format is a little different with regards to what image sizes you can use and how much content you can add.
Facebook offers the following formats:
Desktop News Feed Ads
This will show your advertisement as if it was a normal post in the user’s news feed. You can recognize ads by the Suggested post indication below the page name.
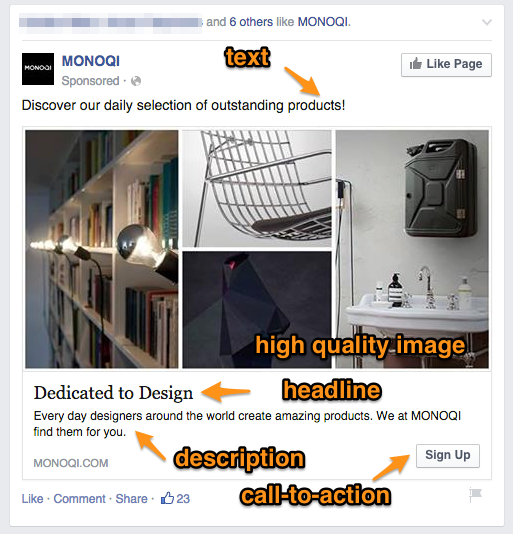
Things you need to provide:
- High quality image: (ideally with a 1200 x 628 resolution)
- Text: the actual text in the Facebook post, make it appealing!
- Headline: this is the title of your link
• News Feed Link Description: this extra text will describe the link
- Call to action button: select one of the calls to action. Try out different strategies: Shop now to push people straight to your products. Or, like the example above, Sign up, to push people to an email list
- Select a Conversion tracking pixel
Mobile News Feed ads
These are the same as the Desktop News Feed ads but they only show on mobile. That’s why you have fewer characters to get your message across. Use this to your benefit and stay on point!
Use this format only if your website works well on mobile, otherwise you’re wasting money.
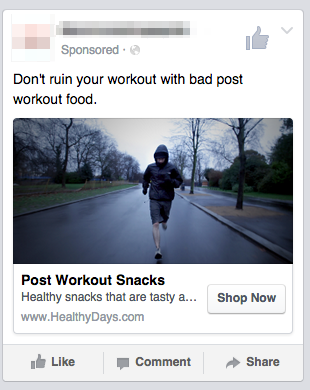
Right Column ads
These ads aren’t as prominent as News Feed ads, so that’s why they have lower click through rates. Upside to that is that they are also cheaper.
This format doesn’t offer a call-to-action button or News Feed Link Description. Your main weapons are your picture and headline!
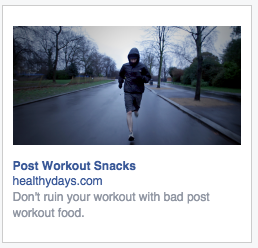
Audience Network ads
This format shows your ad in third party mobile apps.
I haven’t seen any decent results from these placements, so I wouldn’t advise on including them.
To use the desktop & mobile news feed ad formats you’ll need to link with your Facebook page. If you haven’t got a page yet, you can only use the right column ad format.
Now you’re almost done! Time to review order, and if everything looks good, click
Place order!
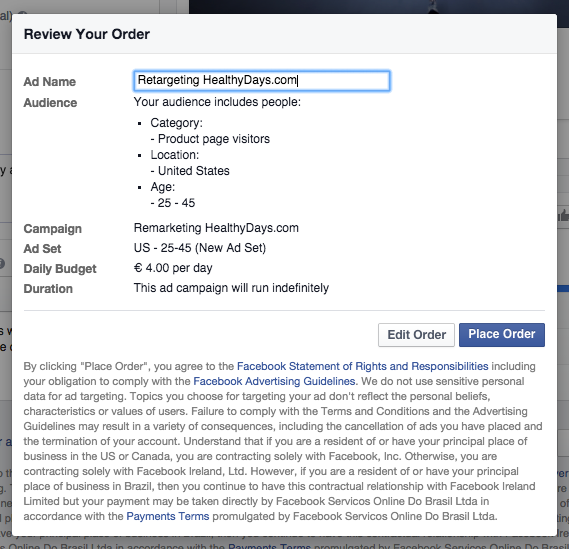
Facebook will review your ads and if approved, you’ll be notified that your ads are live and your campaign is running!
Step 4: Monitoring Campaign Results
Once your campaigns are running, you can see the results in the Ads Manager.
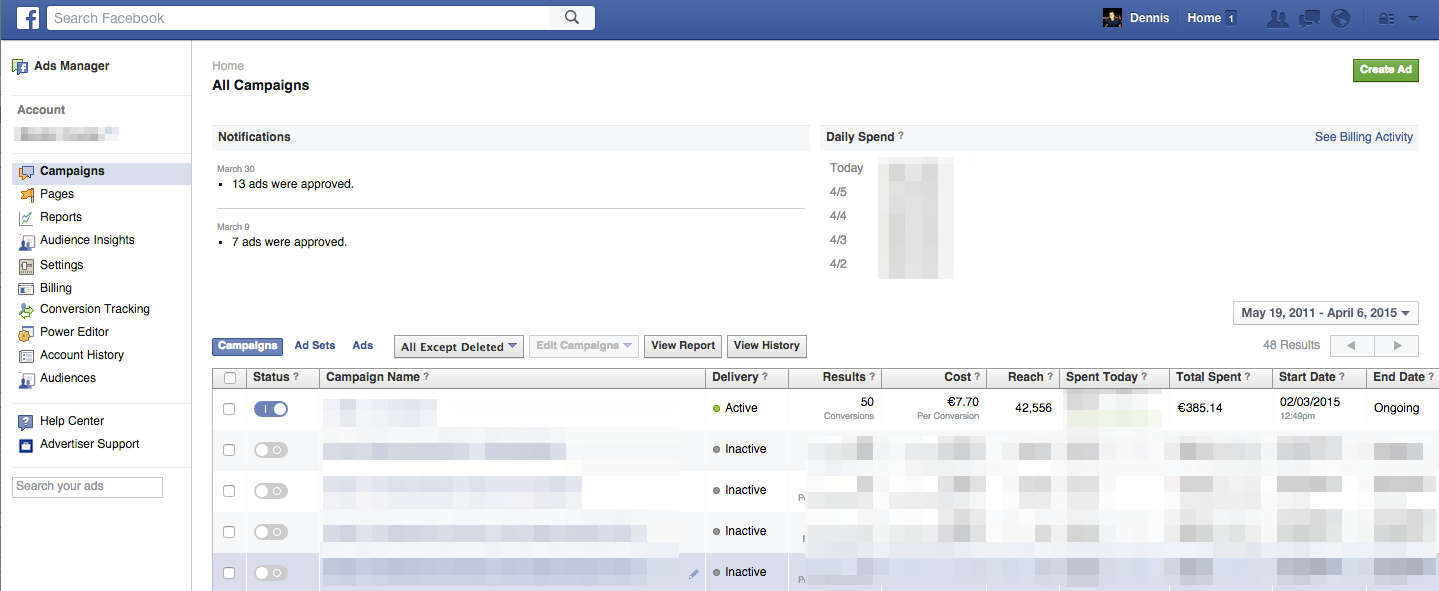
In the beginning you won’t have much data to go on but after a while the good ads will start to separate from the mediocre ones. Optimize based on CTR, the number of website conversions and the cost per conversion.
You can create new advertisements with different texts, headlines or images to test which variant performs better. Testing new ads is the key to getting better results.
That’s all you need to start running your own Facebook retargeting campaigns for your store!

Dennis Moons helps ecommerce stores use online advertising to increase sales.
If you also want learn how to get more traffic to your store, check out
storegrowers.com.